When you start to upload your prices in SabeeApp, you should start with the Master Rate plan. The Master Prices are the basis of all other Rate Plans that you create later on.
Navigate to Prices menu and choose Rateplans. Here, just simple click on the text "Master Prices" and it will be opened on a new tab. Changes can be made on the "All rateplans" tab and you can check them on the separate tab.
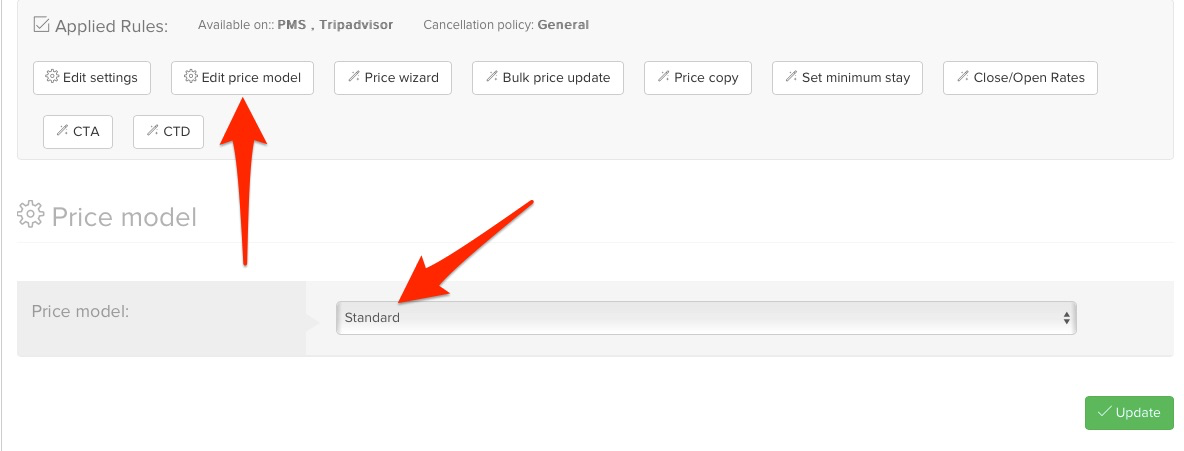
First of all, you have to set up the Price Calculation model of the software. By clicking on the "Edit price model" section you can choose between Standard or Price Relation models.

Standard Price model - this option allows you to enter price value for each and every occupancy.

Price Relation model - you have to set specific rules for each of your room types. The prices are calculated based on these rules.
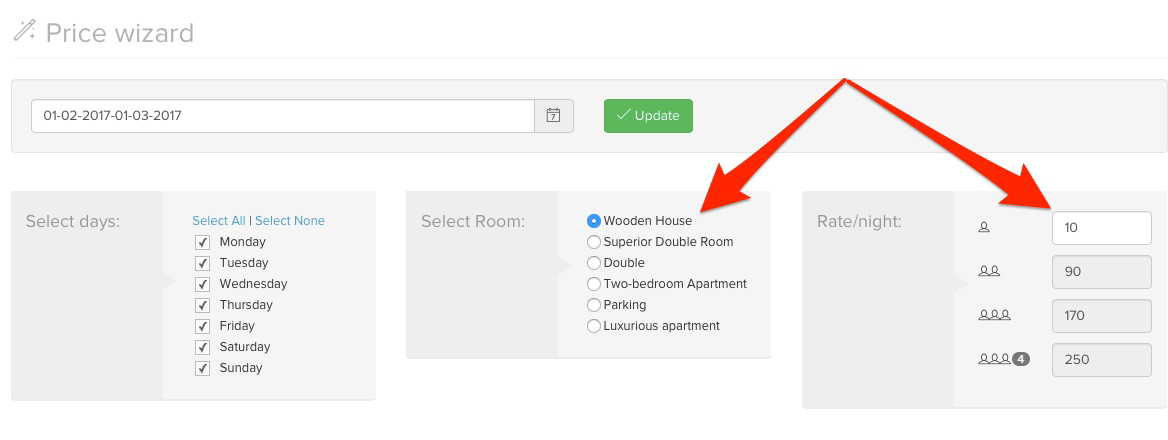
First, you have to define the default occupancy in each room type. The prices are calculated based on the default number of occupancy and the defined relations.
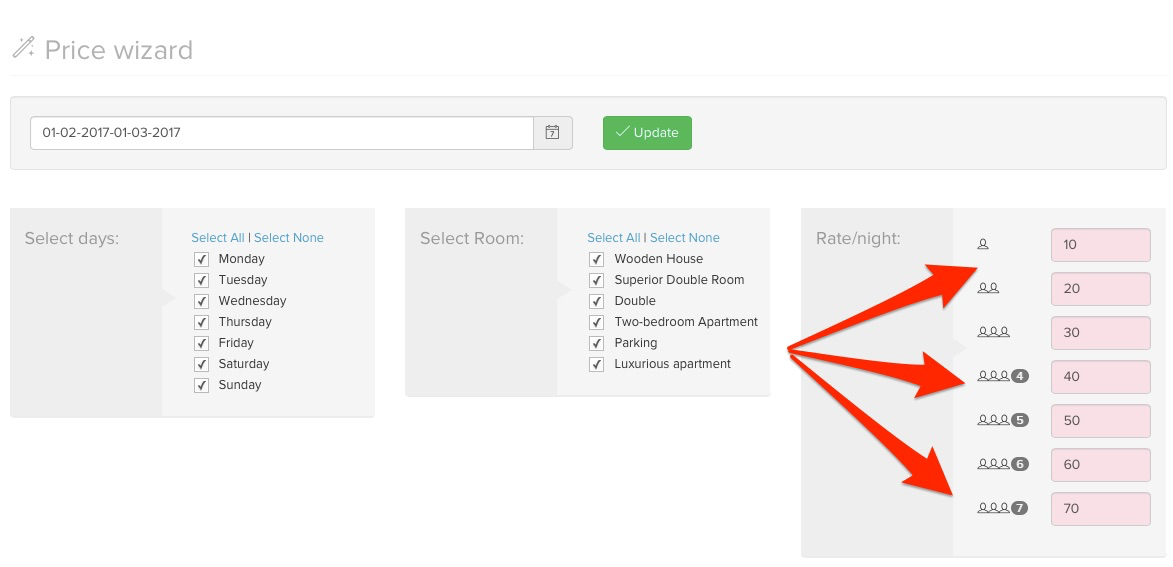
After you updated the Price Relation model, you should add prices with the help of the price wizard. System will allow you to enter price only for that occupancy, which you marked to be the default. Prices for rest of the occupancies will be calculated automatically by your given formula. In case the room price would be a negative amount based on the applied rule, 0 will be displayed at the price instead of the negative amount. In case you modify the default prices and the applied rule would result negative amount for the smaller occupancy, a popup message will come up to inform you to review your default prices.

It is very important to note that in case you use the Price Relation model in SabeeApp, you have to set the same relation rules OTA's where this applies. If you don't set the same price relation rules in the OTAs, we cannot synchronise the prices properly. The support colleagues of the OTA's extranet can always help you in such cases.
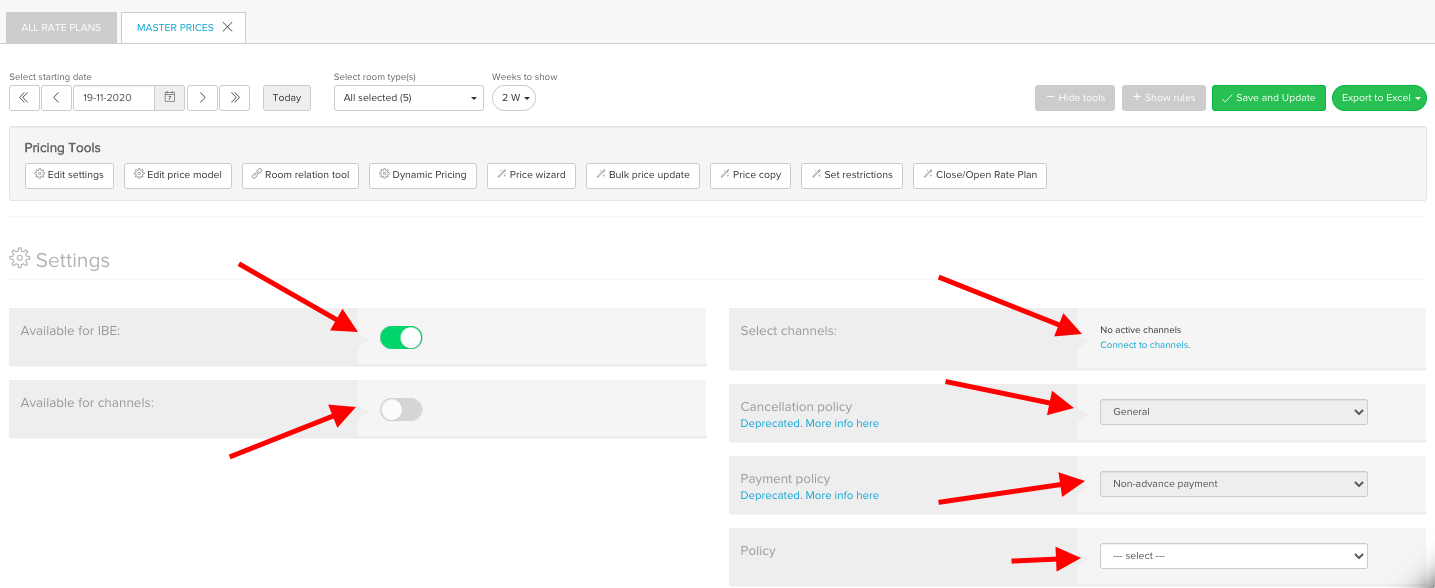
Once you finished the setup of the Price model, click on the Edit Settings button. Here you will see a variety of modifiers which will affect your Master Prices and can be set based on your preferences.

Available for IBE: Here you can open the Master Prices for your clients on your Internet Booking Engine. If the bubble is green it means that they can see it and they can book with Master Rate.
Available for channels: Here you can open the Master Prices for your clients on the connected channels. If the bubble is green than the prices are available on the OTA's listing and the clients can book on this price. If you don't have any channels active, then slider will be inactive (grey) by default and you will not be able to slide it.
Select channels: Here you can choose the channels to which the Master price should be connected. This function is only available after you requested the channel connection from the Distribution/Channel Manager menu.
You can have three statuses after you ticked one or more channels.
I. Requested means that the mapping team was notified about your demand and they will connect the Master price to the selected channels as soon as possible.
II. Active means that the mapping team connected the Master Price to the channel.
Only in Active status will your changes affect the OTAs.
III. Inactive means that the Master Price was disconnected from that channel.
Cancellation policy: This option was deprecated due to the new policy settings. It is not possible to select or modify this anymore.
Payment policy: This option was deprecated due to the new policy settings. It is not possible to select or modify this anymore..
Policies: If you have already added your Policies under the Settings / Property policies / Cancelation and payment policies menu, you will be able to select from these here. This policy will be effective for the rate plan from that point on.