Once you have tried Sabee and you decided that you would like to take 100% out of it by starting to use a channel manager, there are a few steps that you need to accomplish before the connection is established.
- REMOVE ROOMS FROM YOUR PUBLISHED INVENTORY.
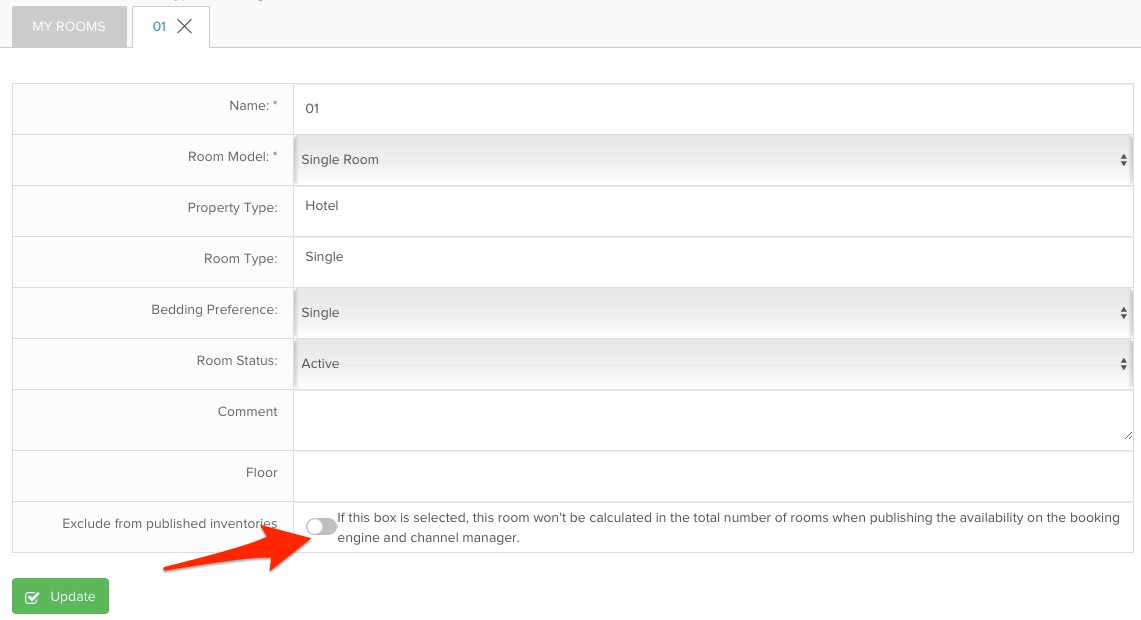
You probably noticed this little box when creating a room:

If you check this box then the room will appear in the calendar but it will not be synchronised with the channels or shown on the booking engine. This option is useful when you would like to have a few extra rooms in case you get an overbooking or you would like to have some rooms as a "backup" when you want to accommodate more guests.
2. UPLOAD YOUR RESERVATIONS TO SABEE CALENDAR.
Another important step before connecting to any channels is to have your future reservations uploaded in SabeeApp. Once the connection is made, we are constantly synchronising the calendar FROM SabeeApp TO the channels. In order to avoid to have an empty calendar view on the channels, you need to update your calendar in SabeeApp. After the connection is made all new reservations will automatically appear in SabeeApp. If you don’t have too many reservations, you can upload them manually in the calendar. This is a great opportunity to learn how to upload reservations! However, if you have too many to upload manually, we can always import your current reservations from your previous system or file (.xls, .csv, .xml, .sql, .numbers) to your new SabeeApp account. Good to know that Booking.com and Airbnb provide the option to import reservations from them manually. So all reservations that are made in these two channels will be imported before the connection.
3. MAKE SURE THAT PRICES IN SABEEAPP ARE CORRECT.
Before we connect you to the channels, please, make sure that the prices you put on SabeeApp are accurate because the prices are imported FROM SabeeApp TO the channels and not the other way around.
Please note, that most of the channels give you the possibility to create rate plans. If you want to use the same rate plans in your SabeeApp, make sure that you create them there as well (Prices/Rate Plans). Only if there is a matching rate plan on the channel and in SabeeApp we are able to map them successfully and synchronise with the correct pricing.
4. UPLOAD THE PARTNERS.
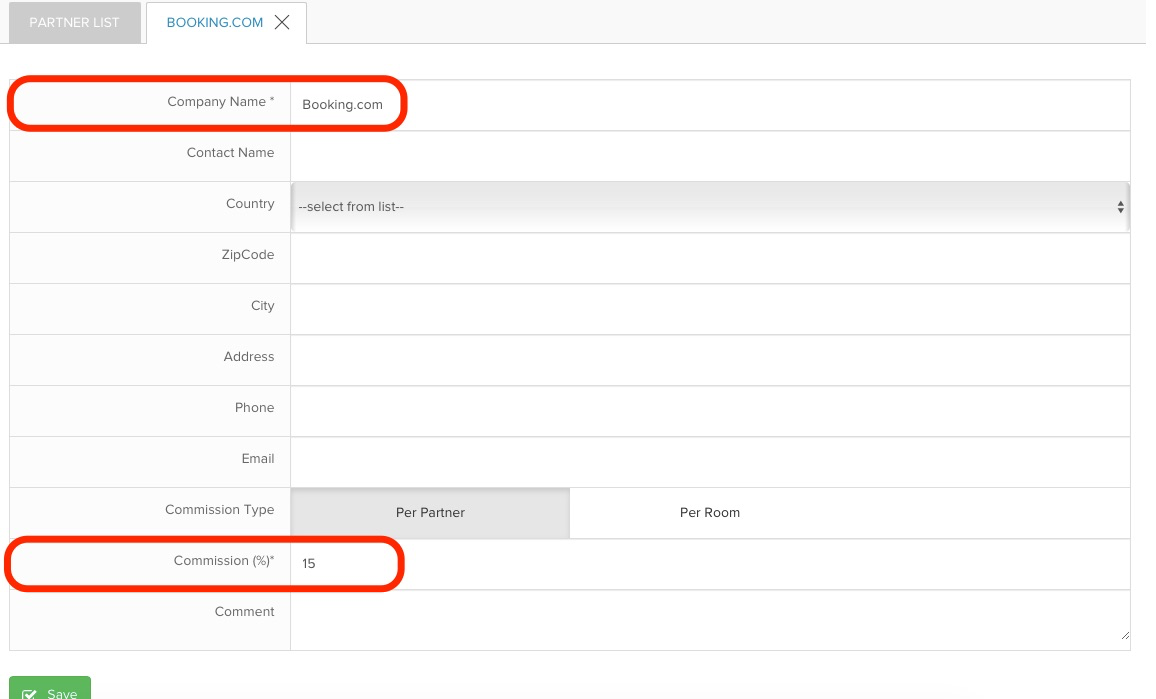
The last step to complete before a successful connection is to upload your Partner list. You can do that in Settings/Partners. Fill in there the partner's name and the percentage of the commissions you pay for this partner, e.g. Partner name: Booking.com, commission: 15%.
This is an important information because once you request a channel connection you will have to map it with the partner from the list. So if you are willing to connect to Booking.com via channel manager, first update the partner in the Partner list and map it when you will be filling in the connection request.

Partner mapping will help you to get accurate reports regarding the commissions and also will help you to figure out which partner brings the biggest amount of guests to your place.
Please note: entering partner commissions will not have any influence on the prices. It is used only for reporting purposes.
5. CANCELLATION AND PAYMENT POLICIES SETUP
Create at least one policy that you wish to use. HERE is the guide for the policy creation steps.
When you are ready with all the displayed requirements, the Channel manager menu will automatically open up and then you can proceed with the channel connections.