The new reservation page can be separated into 7 separate sections. Let's check them one by one!
1. Status

By clicking on the pencil icon, you can edit the status of the reservation. As you click either on the Reservation code or ResID the data will be copied to your clipboard so it's ready for an immediate insert.
We introduced the stages of the reservation to be visually more clear-cut. By clicking on the circle and pressing down for 1 second the selected stage will be active.

If you activate the status by accident, you can reset by simply clicking on the dot.

You can also delete the reservation from this Status section if you have the permission and there is no invoice issued yet for this reservation.
2. Reservation details
In this section, you can edit specific attributes of the reservation. Simply just click on the Edit button. Don't forget to press Save once you are done.

3. Guest details

The Guest details section is working entirely the same as in the previous reservation page. Here can you read more about.
4. Tools
We collected every supportive info and actions into the Tools section.

- The first one is the Activity, where you can check all past history of the reservation.
- The second is the Message from where you can send manual message to the guest's e-mail address or check the scheduled messages for this reservation.
- The third is the Printing Center from where you can print the Check-in card or the reservation details.
- The last one is the Notes, where you can add or edit comments, related to this reservation. If there is a note, then a small red dot will indicate this info on this icon.
5. Booked Price
In this section, you can edit the aspects of the accommodation price or select another rateplan, or apply a coupon.
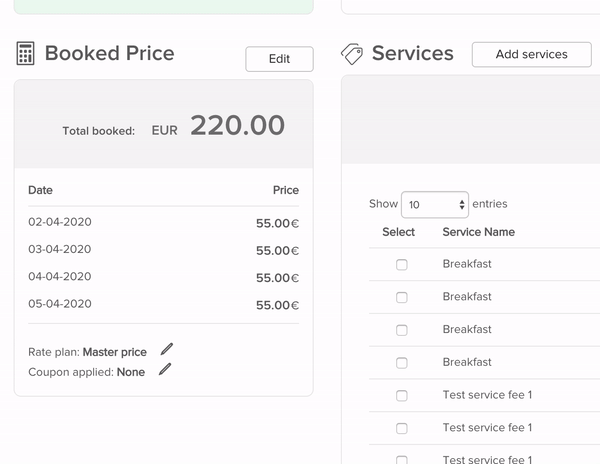
6. Services
The Services section is working entirely the same as in the previous reservation page. Here can you read more about.

The only change what we made here was to remove the Action column. From now on you can edit the service details by clicking on its row.
If you mark a service it is possible to delete it with the delete button, which will appear next to the Add services.

7. Folios
You can issue invoices by clicking on the Create new invoice button. You can also activate the VAT free status with the Toggle VAT free button. More about the folios in the Videoacademy (Support Centre).
